
Post Game Day Recovery: 3 Stretches for Football Players
Game Day! High school football kicked off this weekend, collegiate games begin this week and NFL pre-season is in full swing. Many players will come off the field feeling different then when they stepped on.
Here are my go-to yoga poses that aid the body (and the mind) with recovery time and stay on top of mobility before Monday’s practice. Our belief in preparing for intense competition tends to focus on resting the body to recover, but we can’t neglect the power our neurological system plays in sensory input and motor output when it comes to recovery as well. An athlete’s ‘fight and flight’ response (aka sympathetic nervous system) heightens during game time and depending on many other media impulses and activity a player sees on a given day could have a difficult time down regulating the nervous system. These 3 poses tap into the ‘rest and digest’ response (aka parasympathetic nervous system) to soothe the autonomic nervous system so that it is available for peak performance the next time we ask it to compete again.
*Before I lose all my non-athlete followers, I want to mention that although these three stretches are featured for football players post game they are also taught in yoga classes regularly as a way to unwind and helpful after long day of travel, sitting at a desk, or standing at a job all day. I still encourage you to read on.
Yoga transcends the purpose of learning to let go.
For some players, the outcome of a game may be their worst enemy in letting go. Mindfulness and guided meditation utilizing breath awareness with a specific focus can assist with moving on to the next opponent.
Always begin with a breath “check-in” to soothe the nervous system and allow it time to start down-regulating. Observe the quality of your breath. Notice if you are creating movement into the low ribs during inhale/exhale. Practice using the diaphragm to return the nervous system to a restful state post game time.
1. Child’s Pose — Balasana (bah-LAHS-uh-nuh) — is a common beginner’s yoga pose and is often used as a resting position in between more difficult poses during a yoga practice. The word “Balasana” comes from the Sanskrit words “bala” (meaning “child”) and “asana” (meaning “pose”).
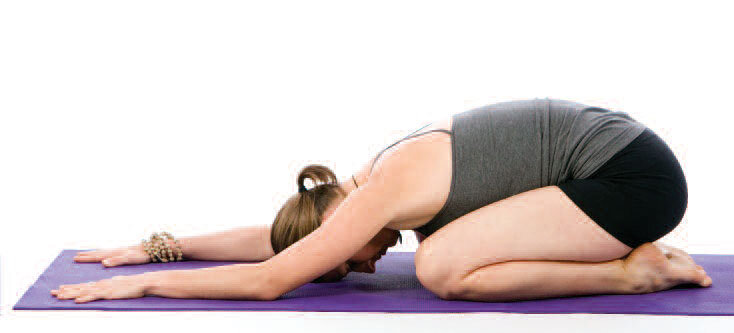
Child’s pose stretches the hips, thighs, and ankles along with the muscles on the front of the body while stretching the muscles of the back torso. This resting pose centers, calms, and soothes the brain, making it a therapeutic posture for relieving stress.
It can be performed with the head and torso supported by blocks or bolster underneath.
- Begin on your hands and knees
- Spread your knees as wide as your mat while keeping your big toes touching towards the back of your mat.
- Exhale and rest your buttocks on your heels.
- Lower your torso between your thighs.
- Your heart and chest should rest between your thighs.
- Allow your forehead to settle onto to the floor.
- Keep your arms long and extended, palms facing down. Press back slightly with your hands to keep your buttocks in contact with your heels. Lengthen from your hips to your armpits, and then extend even further through your fingertips. *For deeper relaxation, bring your arms back to rest alongside your thighs with your palms facing up (embryo pose). Completely relax your elbows.
- Keep your gaze drawn inward (umpada drishti) with eyes closed.
- Hold for up to a minute or longer and breathe deeply but gently.
To release the pose, gently walk your hands back to your knees and sit the torso upright over your heels.
2, Supine Pigeon Twist -- Supta Kapotasana – (SOOP-ta KA - Po- TAS - uh- nuh) Derived from Sanskrit, supta, means “supine,” kapota means “pigeon” and asana means “pose.” is supine (or lying-down) supported yoga stretch for the lower body that relieves stiffness in the outer hips and lower back.
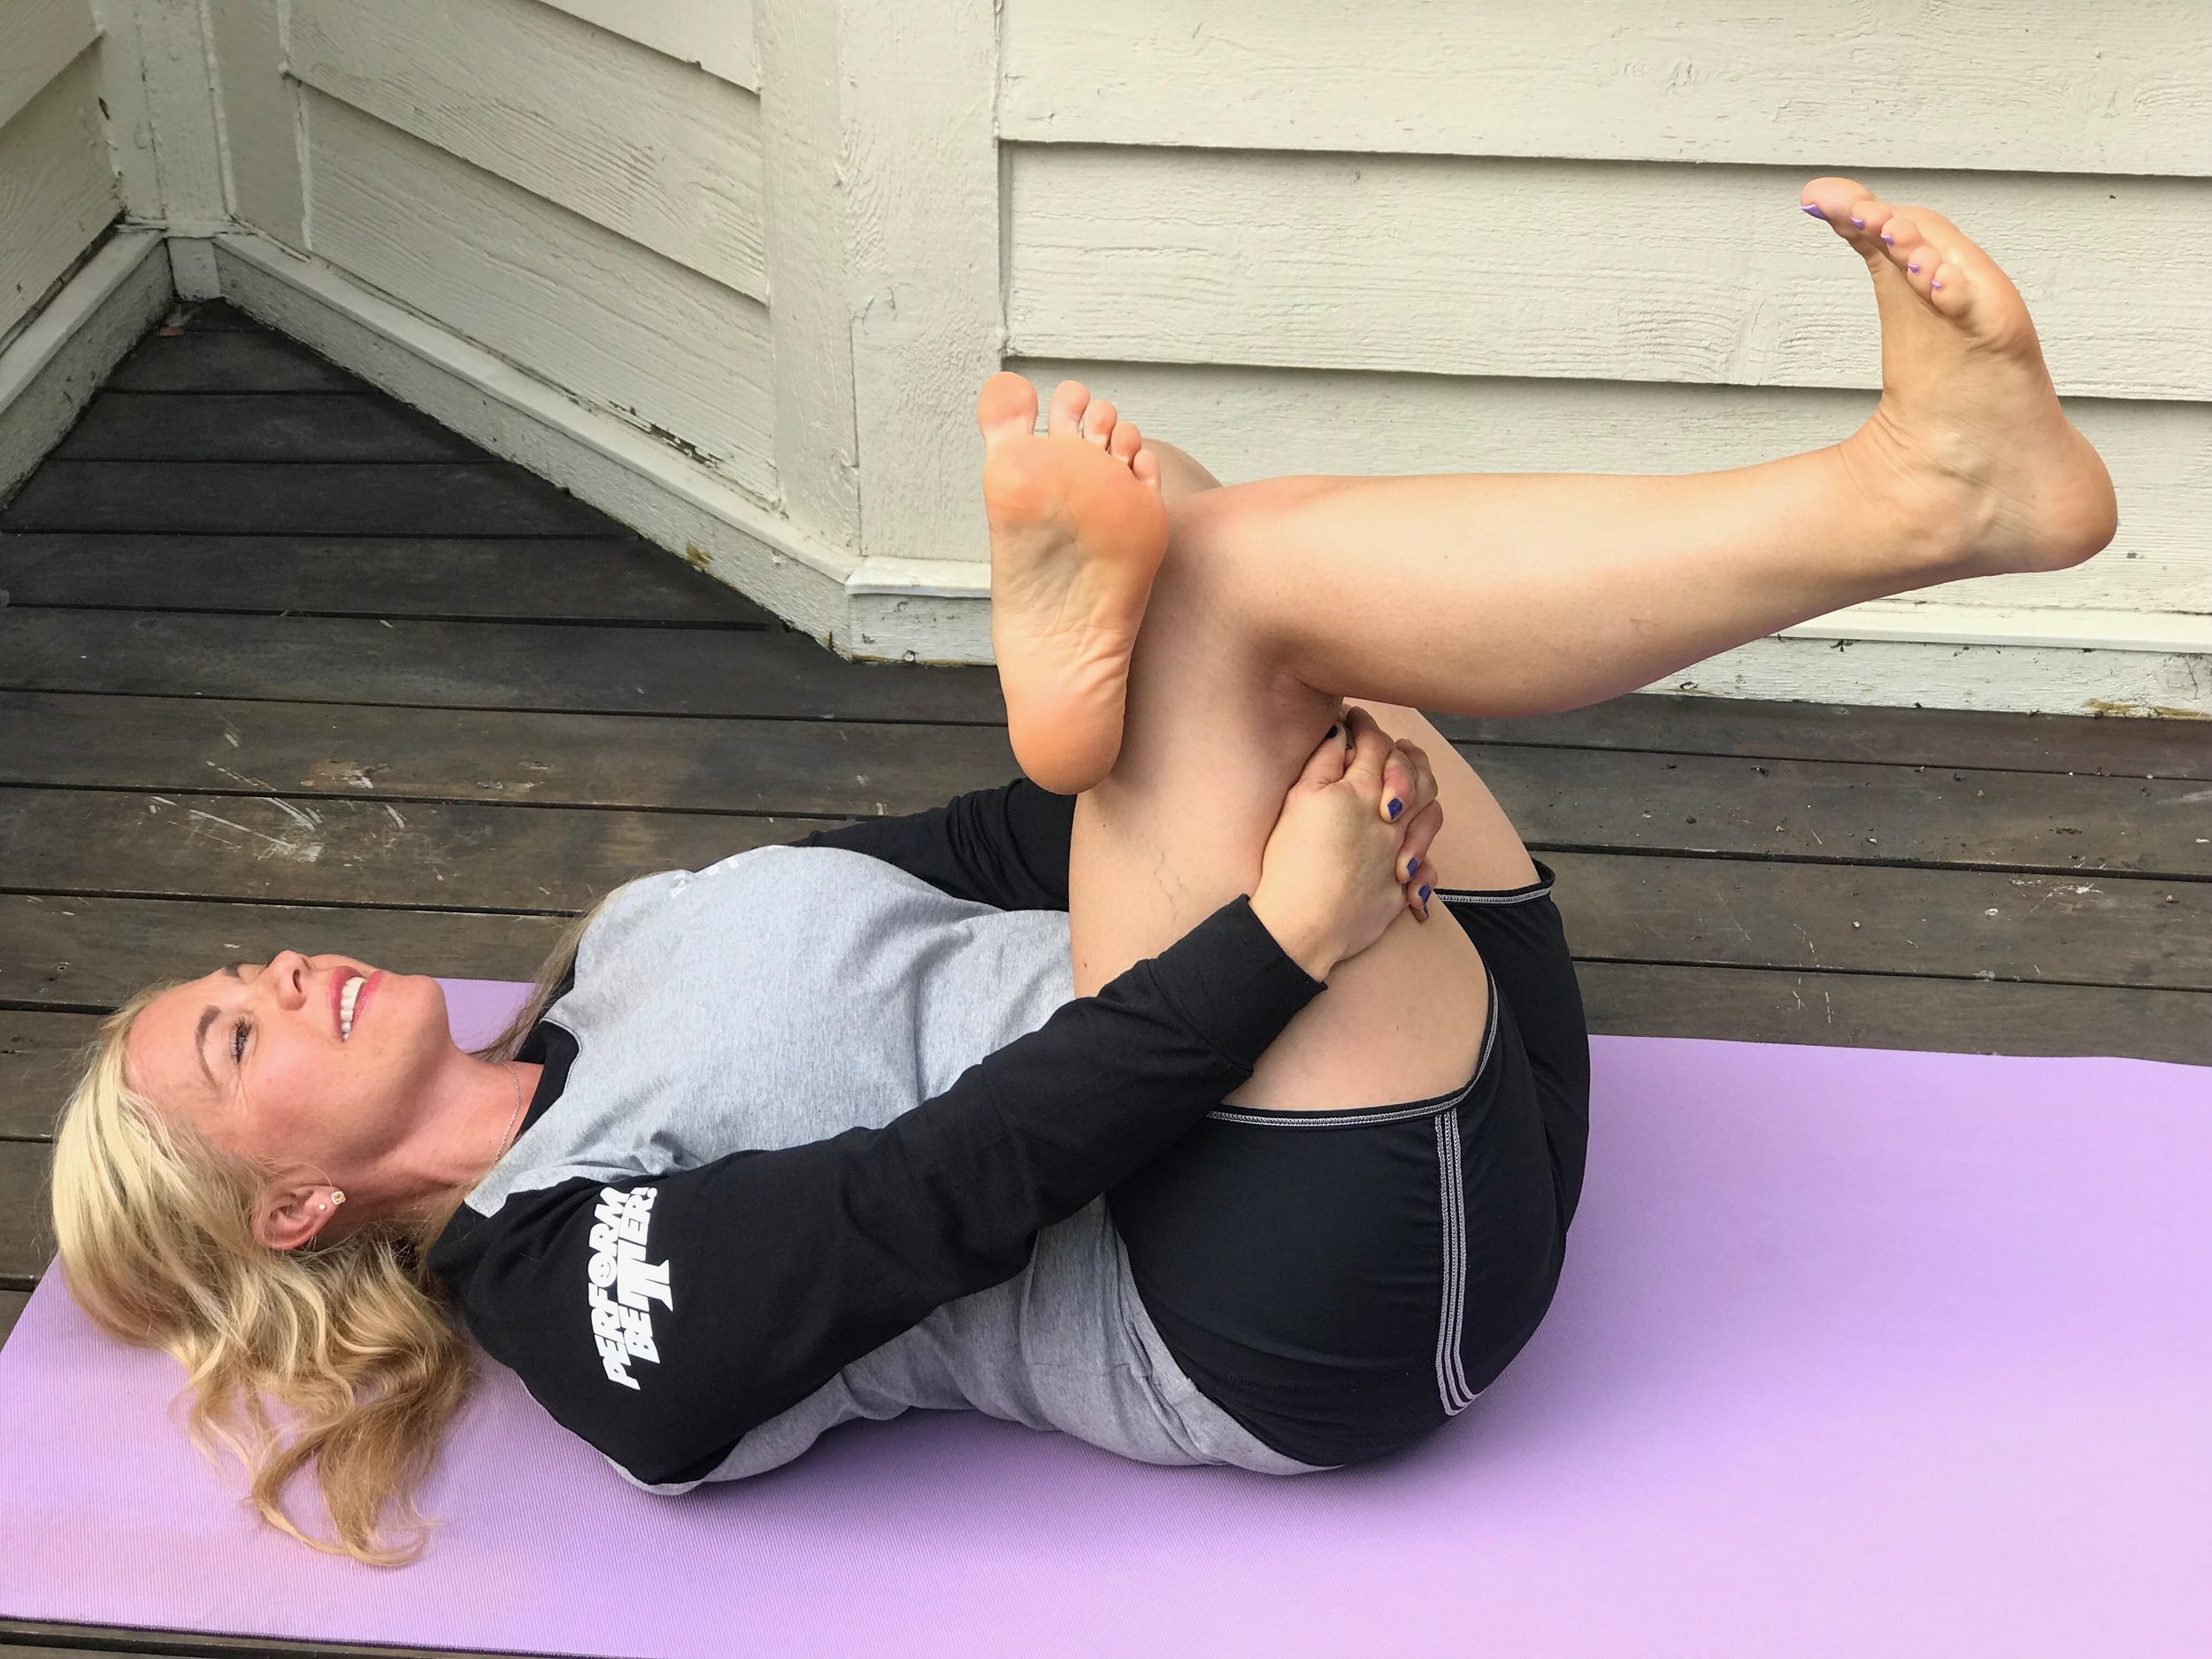
This pose stretches and opens the outer hips and low back while increasing the range of motion in the lower body in a supported position.
How to Get into Supine Pigeon Pose
- Bend knees, placing the soles of feet flat on the mat. Separate your feet so they are hip width apart and the thighs are parallel to one another.
- Straighten your left leg upward, extending your heel toward the ceiling. Then bend your left knee and cross your left ankle over your right knee. Bring your left, outer ankle to the outside of your right knee so your foot hovers in the air. Then flex your left foot, actively pressing through your heel while simultaneously pulling your toes back toward the left.
- On exhalation, draw your right knee in toward your chest. Slide your left hand and forearm through the space between your legs and clasp both hands around the back of your right leg’s thigh.
- Keep back flat on the mat (includes shoulders and tailbone). Release your shoulder blades down toward your waist. Broaden across your collarbones.
- Draw your tailbone and sacrum down toward the mat to lengthen the spine even more.
- Tuck your chin slightly and gaze down the center line of your body. Close your eyes
- Hold for up to one minute. Keep your breath smooth and even along with facial muscles.

How to Get into Supine Pigeon B (twist variation)
- Unlace the hands to release your leg and with an exhalation place your left foot on the floor to the right side of your mat to create the twist. Extend arms out to the sides of mat. Turn head toward your left hand or can stay centered. Close eyes and continue to reflect on breathing. To exit the pose, draw head and hips back to center, extend left leg straight up to the ceiling again, and then bend your knee and place your left foot on the floor.
- Repeat the pose on the opposite side for the same amount of time.
Note: Those with back pain, back injuries, or degenerative disk disease should approach this stretch with caution and should only attempt to practice it under the guidance of an experienced and knowledgeable yoga teacher.
3. Legs Up The Wall Pose - Its Sanskrit name, “Viparita Karani” (VIP-uh-REE-tuh kah-RAH-nee), literally translates to “inverted action.” When you take time out of your day to reverse the forward motions of doing, acting, and accomplishing, you allow your brain and body to settle into a state of pure being. Settling into this state, then, conditions the mind for deeper meditation and self-awareness.
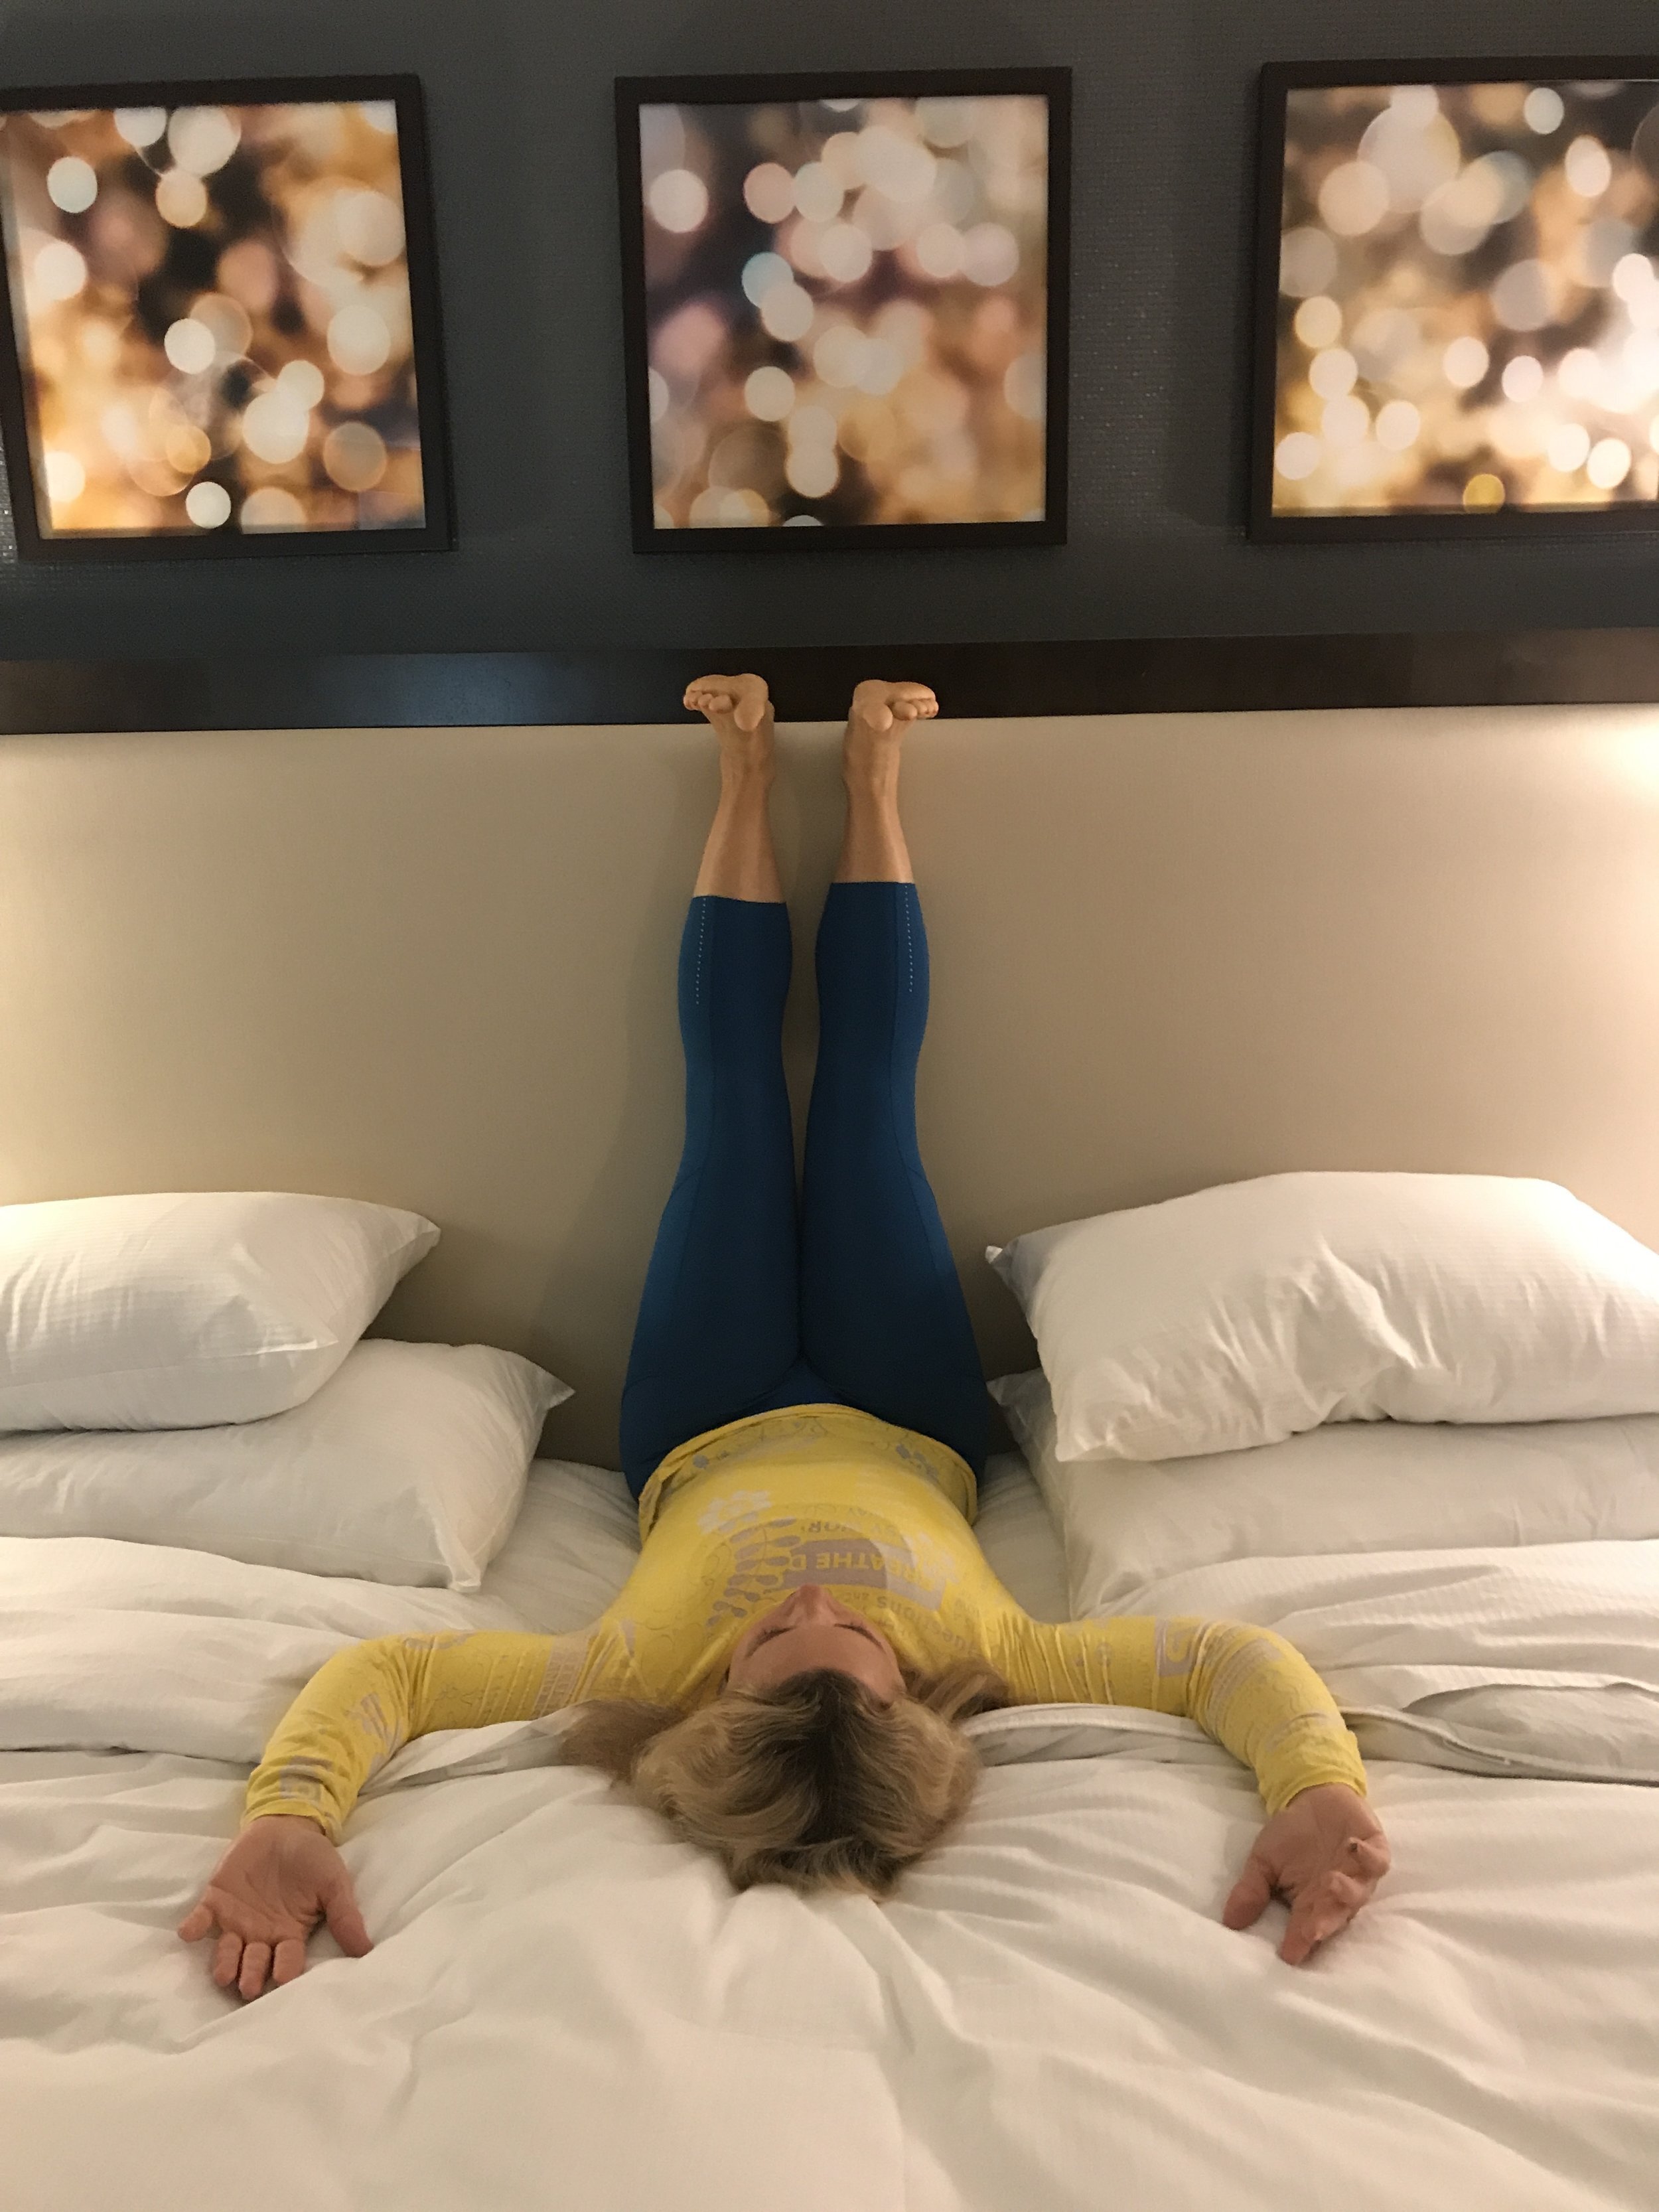
Legs up the wall (or headboard shown here) is a rejuvenating inverted pose that brings relief to the legs especially hamstrings, calves and ankles, feet, spine, and nervous system. It is a gentle way to bring the body into a state of deep relaxation and renewal. This pose is recommended for all, no matter the level of experience.
How to Get into Legs Up the Wall Pose
There are two ways to practice Viparita Karani: Using props as a supported pose, or without props. Both options will provide the same benefits, but the supported version may be more relaxing for some people. Both versions require a wall or sturdy door upon which you can rest your legs.
- If you are practicing the supported version, set a bolster or firm, long pillow on the floor against the wall.
- Begin the pose by sitting with your left side against the wall. Your lower back should rest against the bolster, if you’re using one.
- Gently turn your body to the left and bring your legs up onto the wall. If you are using a bolster, shift your lower back onto the bolster before bringing your legs up the wall. Use your hands for balance as you shift your weight.
- Lower your back to the floor and lie down. Rest your shoulders and head on the floor.
- Shift your weight from side-to-side and scoot your buttocks close to the wall. Let your arms rest open at your sides, palms facing up. If you’re using a bolster, your lower back should now be fully supported by it.
- Let the heads of your thigh bones (the part of the bone that connects in the hip socket) release and relax, dropping toward the back of your pelvis.
- Close your eyes. Hold for 5-20 minutes, breathing with awareness.
- To release, slowly push yourself away from the wall and slide your legs down to the right side. Use your hands to help press yourself back up into a seated position.
If you like more information about using yoga and meditation as cross-training for sports, reach out via email or schedule a consultation. I hope these poses help create balance in your practice and game schedule.
Welcome to in-season--- football has begun!